About the Template
The Instagram Template is in Google Slides. You can add text and images from your camera roll to create the desired post. There are 3 text boxes that have already been created for you that have the font and size necessary to create you Instagram post. If for some reason these fonts, colors, or sizes change, refer to the Styling Guide below to fix it.
|
|
|
Adding and Cropping Your picture
1. Find the picture you wish to use by searching Image Britannica or Creative Commons. Save the image to your camera roll.
2. Press the "+" in the top-right corner of the screen. Choose "Image" then choose "From photos."
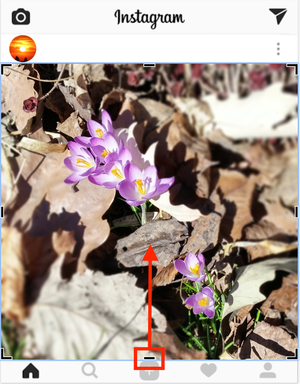
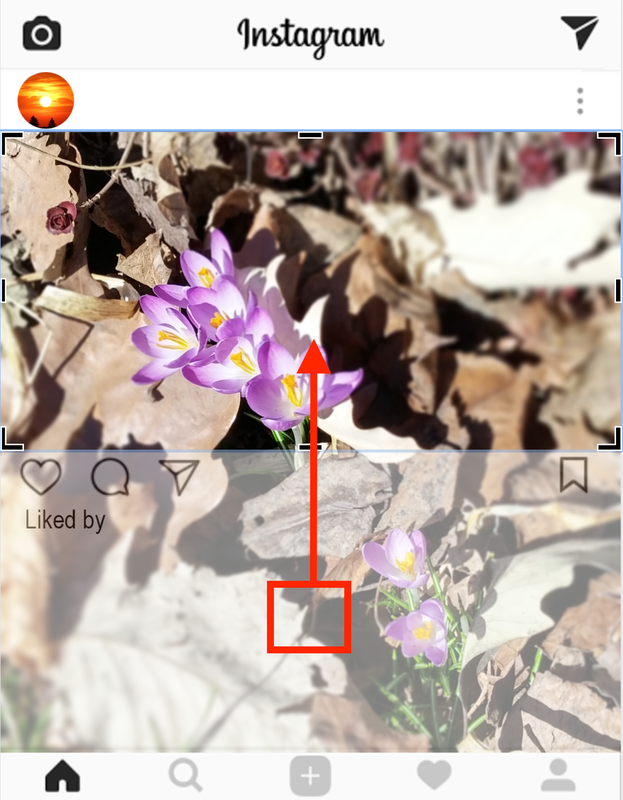
3. Adjust the picture so that the width of the picture stretches across the width of the template page. Double-tap the image to activate the "Crop" tool. Drag the black bars so that the size of the image fits in the designated image space.
You can adjust which part of the photo appears in the cropped area by dragging the actual image into the desired location.
You can adjust which part of the photo appears in the cropped area by dragging the actual image into the desired location.
|
|
|
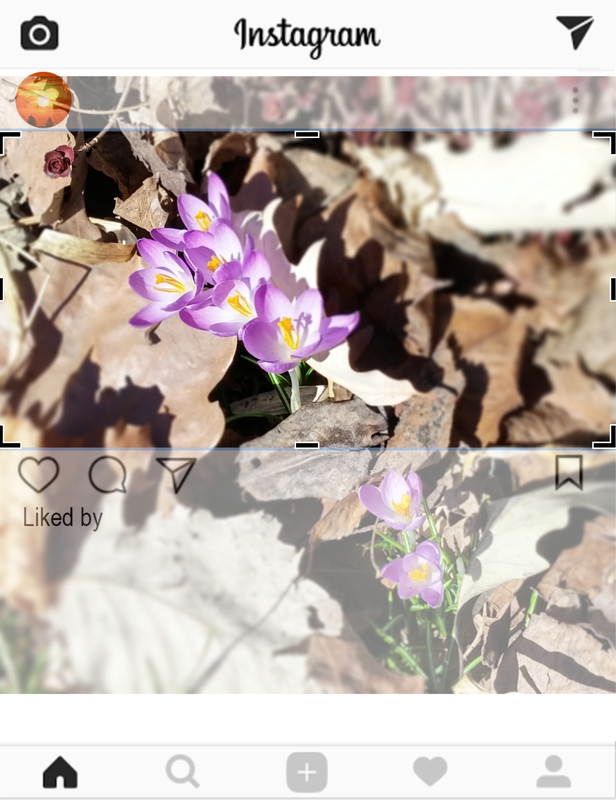
4. Tap in a different spot on the screen to set the size and cropping of the image.
Text Styling Guide
|
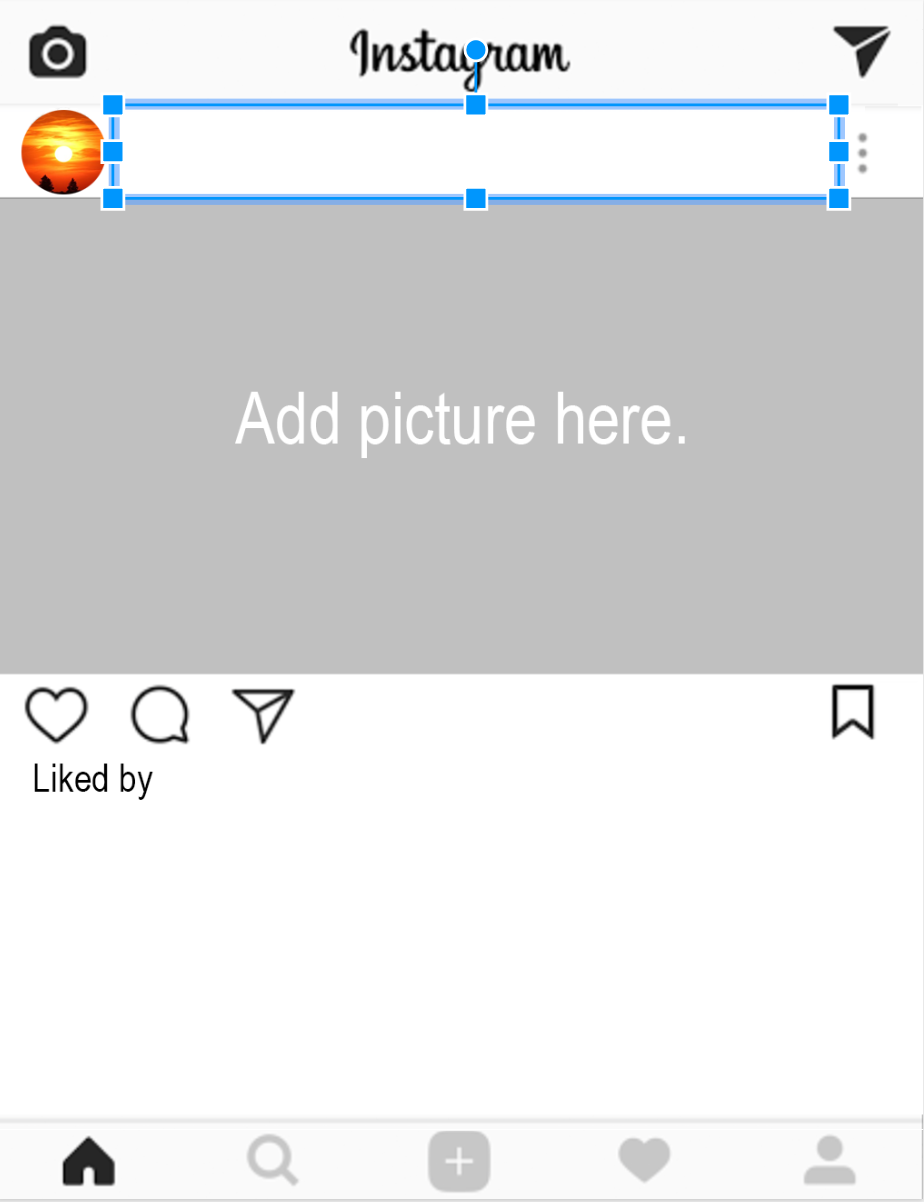
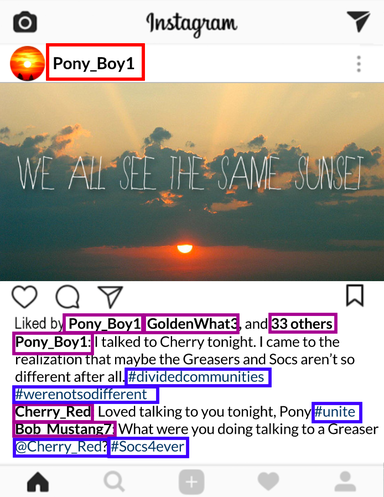
Handle Title:
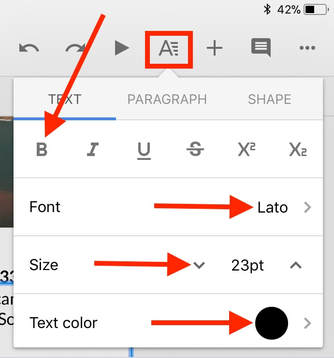
Font: Lato; Size: 26; Style: Bolded; Color: Black Handles in Text Below: Font: Lato; Size: 20-23; Style: Bolded; Color: Black Hashtags and @Handles: Font: Lato; Size: 20-23; Style: NOT-Bolded; Color: Navy Blue Everything else: Font: Lato; Size 20-23; Style: NOT-Bolded; Color: Black |
How to Change the Font of Color
Saving your Post as a Picture
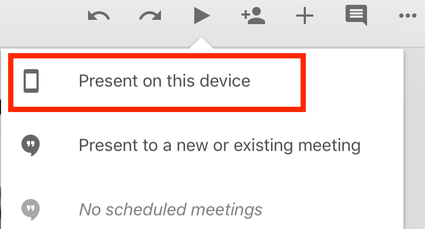
1. Press the present button in the top-right corner. Choose "Present on this device".
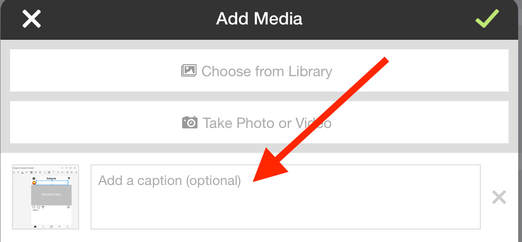
2. Rotate your device so that it is vertical and take a screenshot. You can now add this picture to the Schoology Media Album, #Instagram Theme Post.

3. After adding your picture be sure to write your name in the caption portion.