
Jen Du ARt Project
Create your own Jen Du inspired art project using shapes and colors in a Google Slides Presentation.
|
|
ACCESSING THE ASSIGNMENT (Click here for Video)
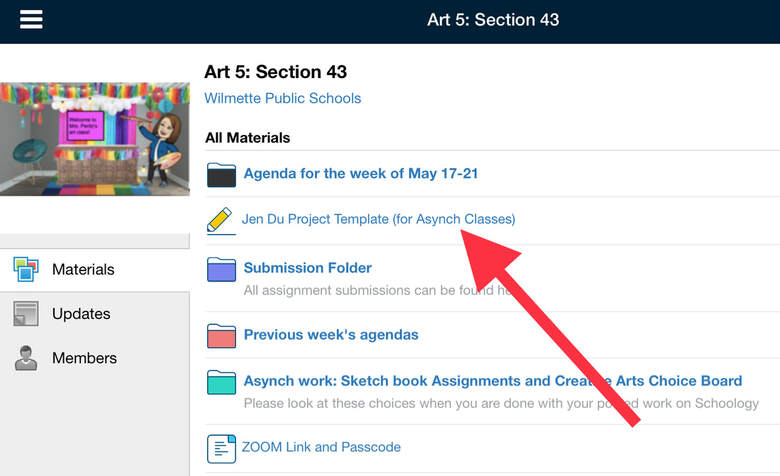
1. Open the assignment containing the Jen Du Project template can be found on the MAIN ART PAGE (NOT IN A FOLDER). It's called, "Jen Du Project Template (for Asynch Classes)."
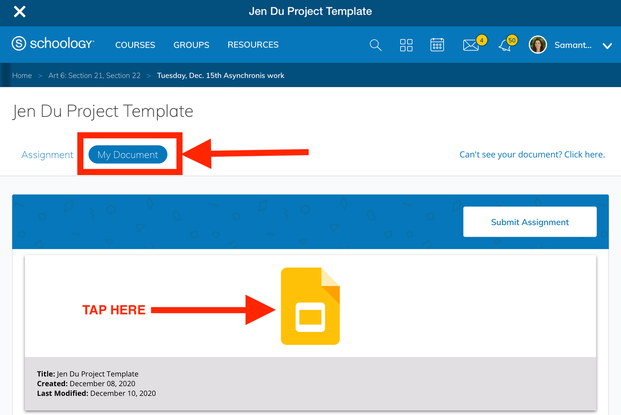
2. Read the directions then click "My Document". Wait for the image of the Google Slide to load, and then tap on the yellow icon.
ADDING SHAPES AND COLOR (Click here for Video)
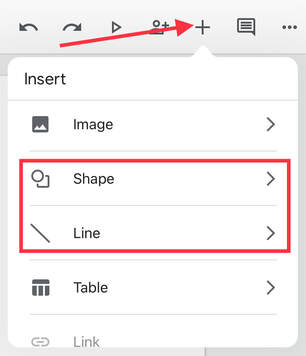
1. Add shapes and lines by tapping on the "+" in the top-right corner.
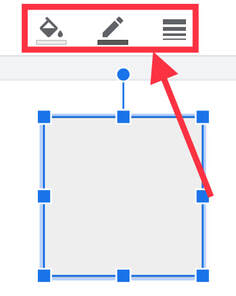
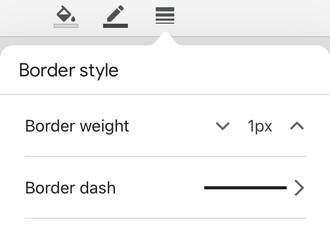
2. Change shape color by selecting the shape and then tapping on the paint bucket. Change the line color or border color by tapping on the pencil. Change the border width by tapping on the bars.
|
|
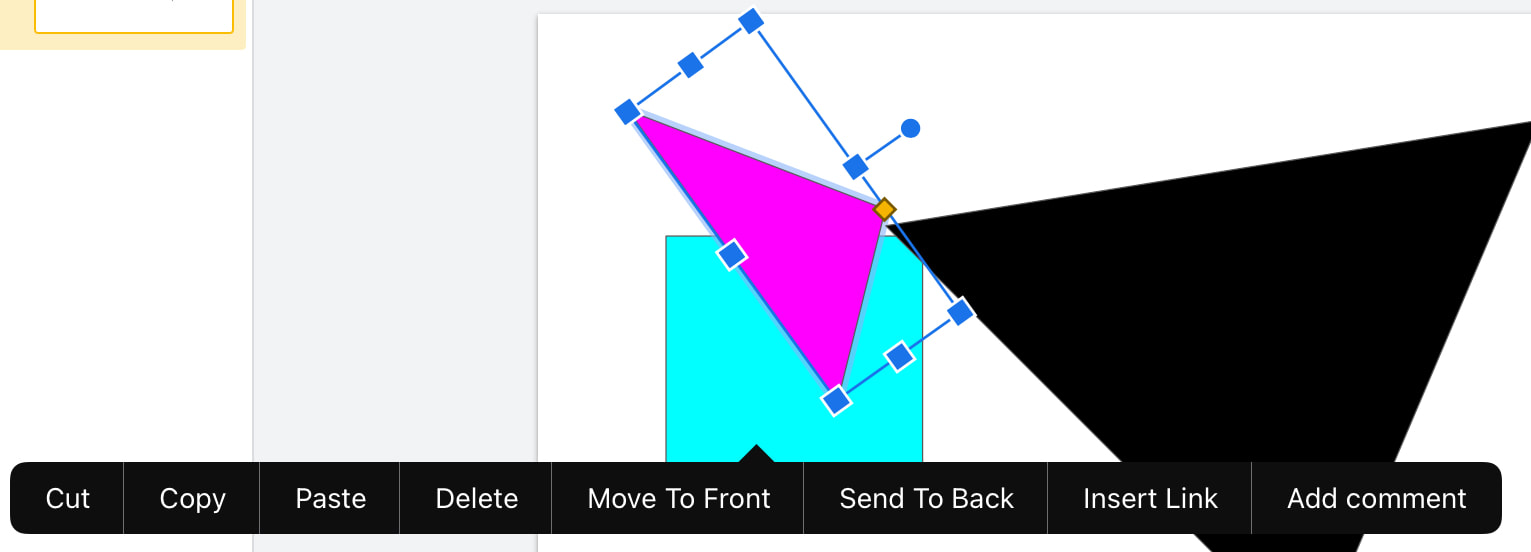
3. Delete, cut, copy, paste, and re-order the shapes by tapping on the shape and then selecting the desired action.
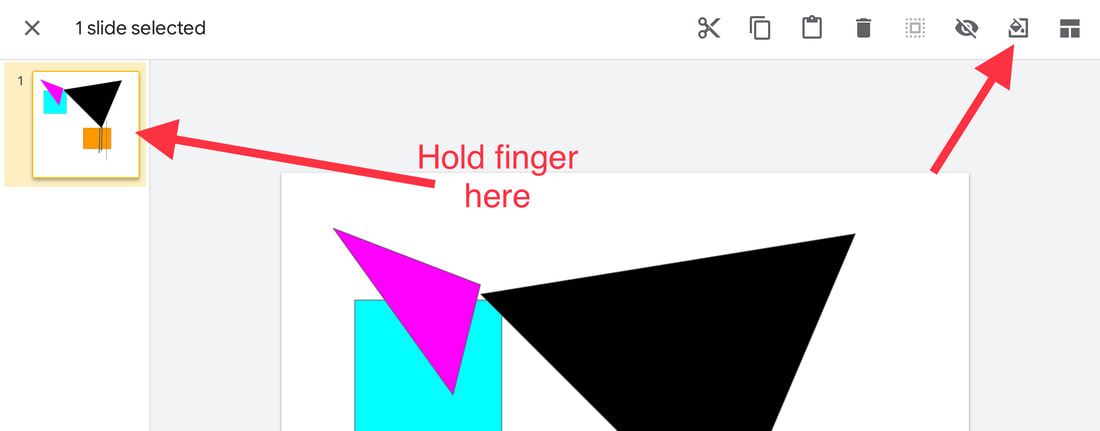
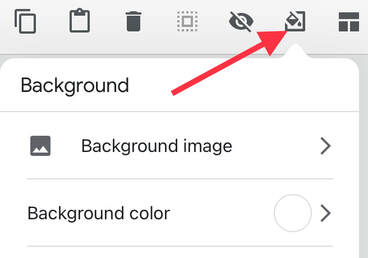
4. Change the background color by holding your finger down on the template slide until the tool bar changes on the top row of the screen. Then select the paint bucket icon to select a new background color.
|
|
EXPORT AND ATTACH TO SCHOOLOGY DISCUSSION (Click here for Video)
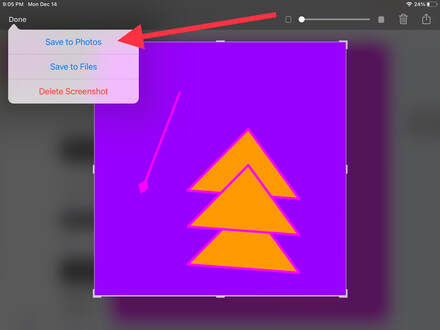
1. Take a screenshot of your final image and crop it so that we only see your image. Then save the image to your photos.
2.Open the discussion posted in the art folder called "Jen Du Discussion". If you don't see it, ask your teacher, it may not be published yet.
3. Open the discussion and start a new comment. click on the attach button and find the picture you saved to your photo library. Don't forget to add a comment! CLICK HERE for more detailed instructions.
3. Open the discussion and start a new comment. click on the attach button and find the picture you saved to your photo library. Don't forget to add a comment! CLICK HERE for more detailed instructions.
