

About Explain Basics
Explain EDU lets you individually record animation and audio onto different slides. You can then exports all the slides to create a video.
Starting a New presentation |

|
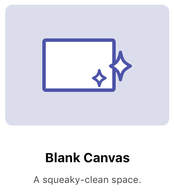
1. Open Explain EDU. Tap on the "New Project", then choose "Blank Canvas".

|
|
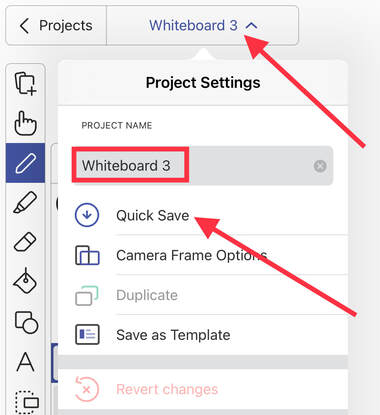
2. Rename your project by tapping on the title "Whiteboard...", and save often!
The Tools
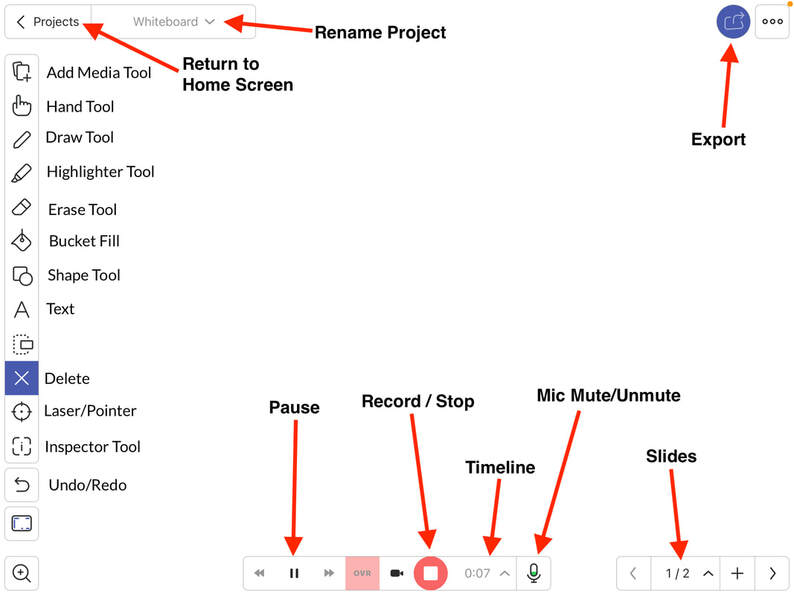
- Hand Tool: Lets you move or enlarge text, shapes, and images before/during/after recording.
- Add Media: Lets you insert photos, videos, sound and more from several locations including your Photo App
- Draw Tool: Lets you draw your own image on the screen before/during/after recording.
- Highlighter Tool: Highlighter behaves just like the Draw Tool but has automatic transparency.
- Erase Tool: Lets you erase portions of pictures, and objects. (Has 3 different modes)
- Bucket Fill: Fill in objects with selected colors. Use the Color Picker to select color and opacity
- Shape Tool: Lets you add different shapes
- Text: Tap on the canvas to insert a text box. Adjust the settings in the menu to change color, font, size and formatting.
- Delete: Select the Delete tool and tap on the object on the stage that you want to remove. Tap the red X to remove the selected object.
- ** Laser / Pointer: This tool will display a laser pointer under your finger. Tap on the icon again to reveal the Laser Pointer styles.
- Inspector Tool: Tap on this tool first, then select the item you wish to modify. You can duplicate, change the order, lock, or set a background image using this tool. (You can also hold down an option to activate the inspector tool.)
- Undo: Undoes the last action. Redo: Redoes the last undone action. This button only appears after you Undo an action.
Slides: Tap the + to Add new slides. Tap the #/# button to see all of your slides for the movie.
REcording your Explain EDU |

|
Watch the tutorial for a reminder on how to record your Explain EDU and correct any errors you may come across when recording.
Exporting/ Submitting Explain Edu to Schoology (Assignment and Discussion) |

|
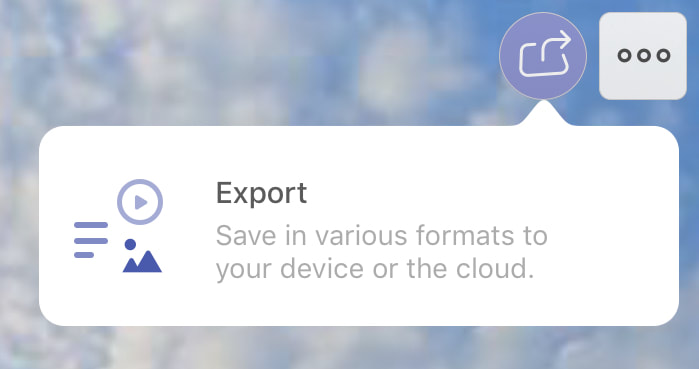
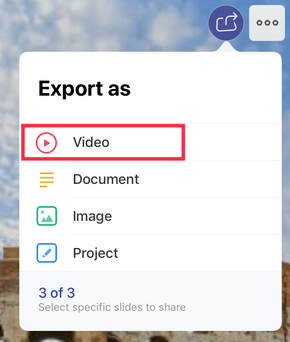
.1. Tap on the Share icon, select "Export". Then choose "Video"
|
|
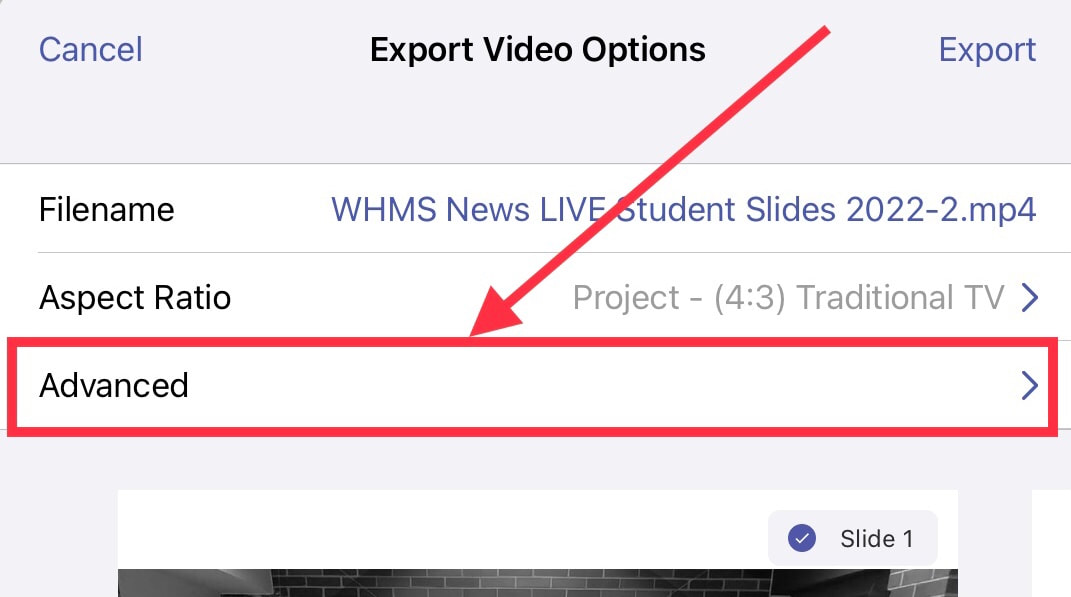
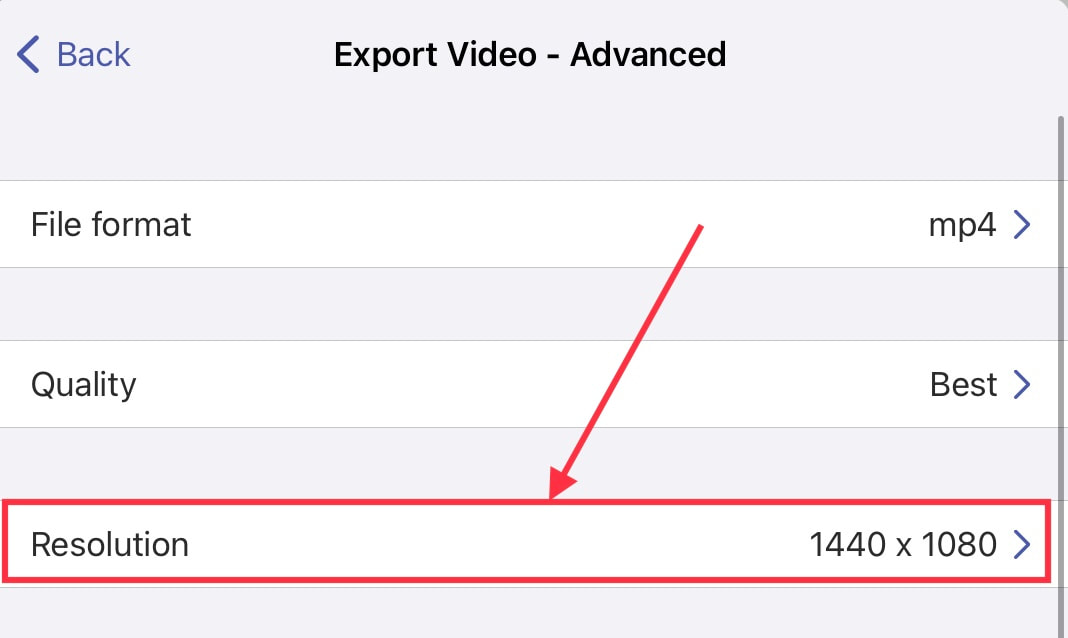
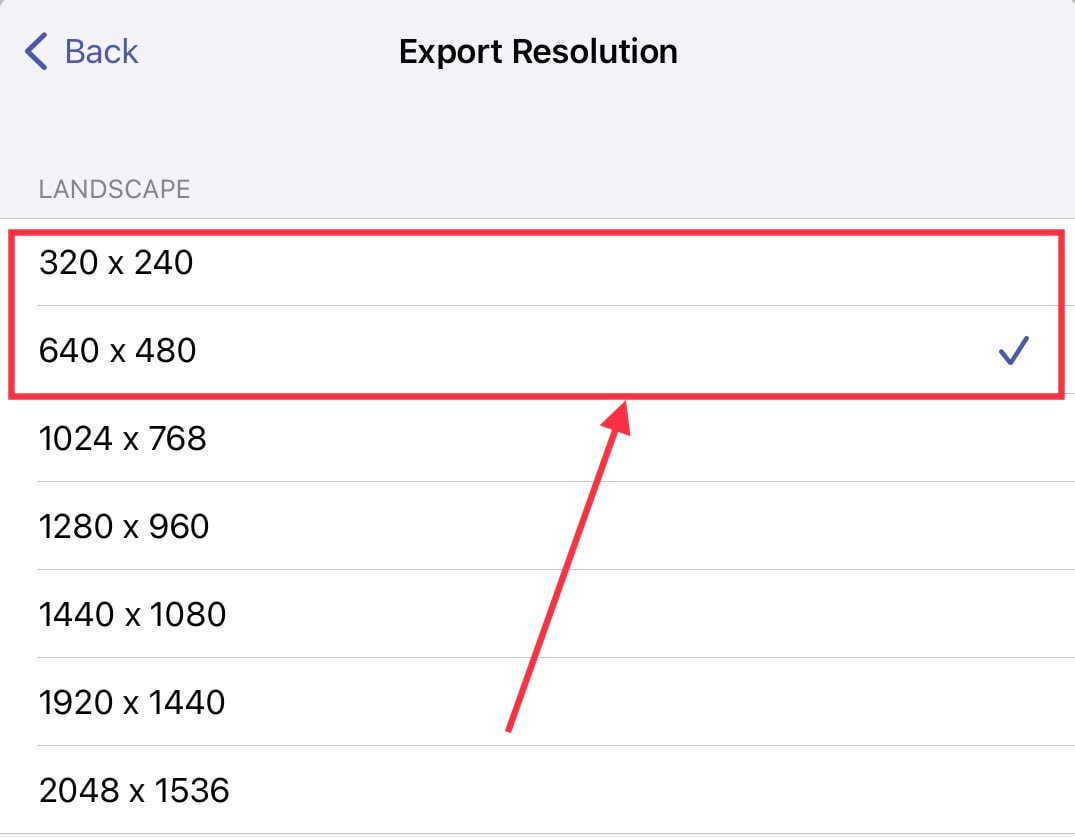
2. Before selecting export. You need to go into the advanced settings, and change the resolution to one of the two smallest sizes.
|
|
|
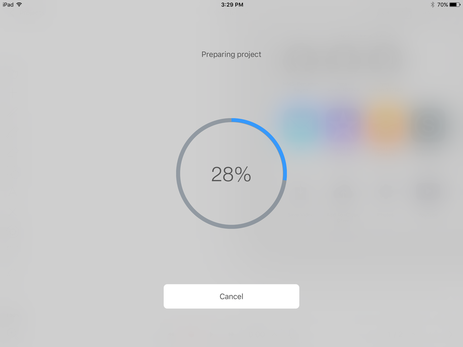
3. Then, hit the back button until you see the option to "Export" in the top-right corner. Wait while your project is prepared. Then select "Photos" as the option for where to save your video.
4. After saving your video to photos, open Schoology and find your assignment or discussion.

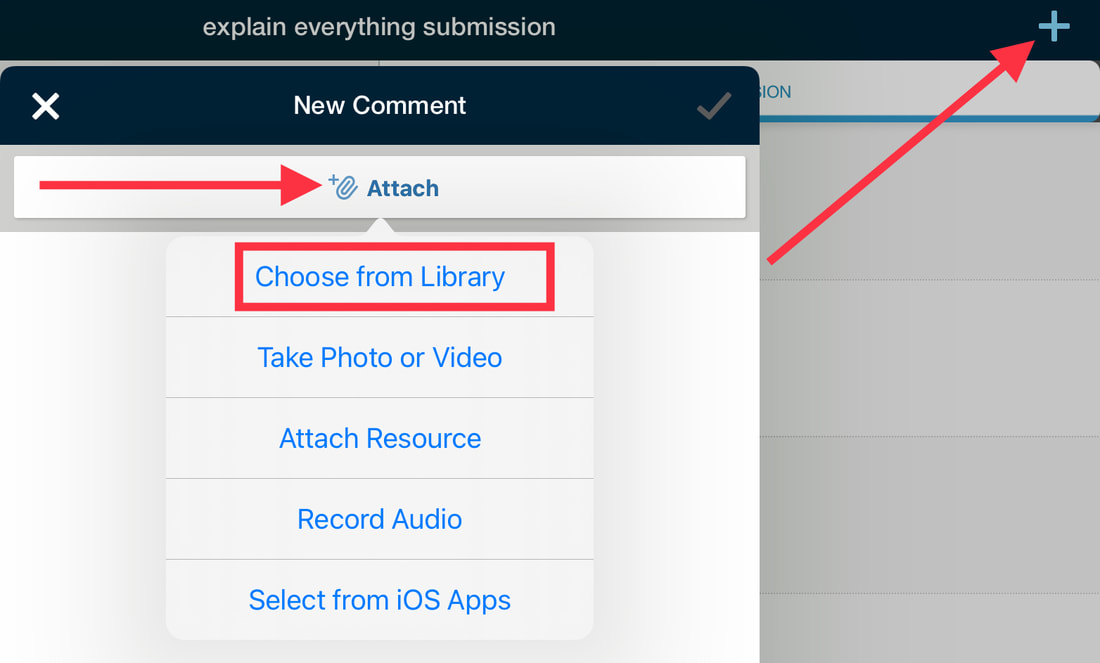
5. To submit to a discussion, open the discussion and choose "Choose from Library.
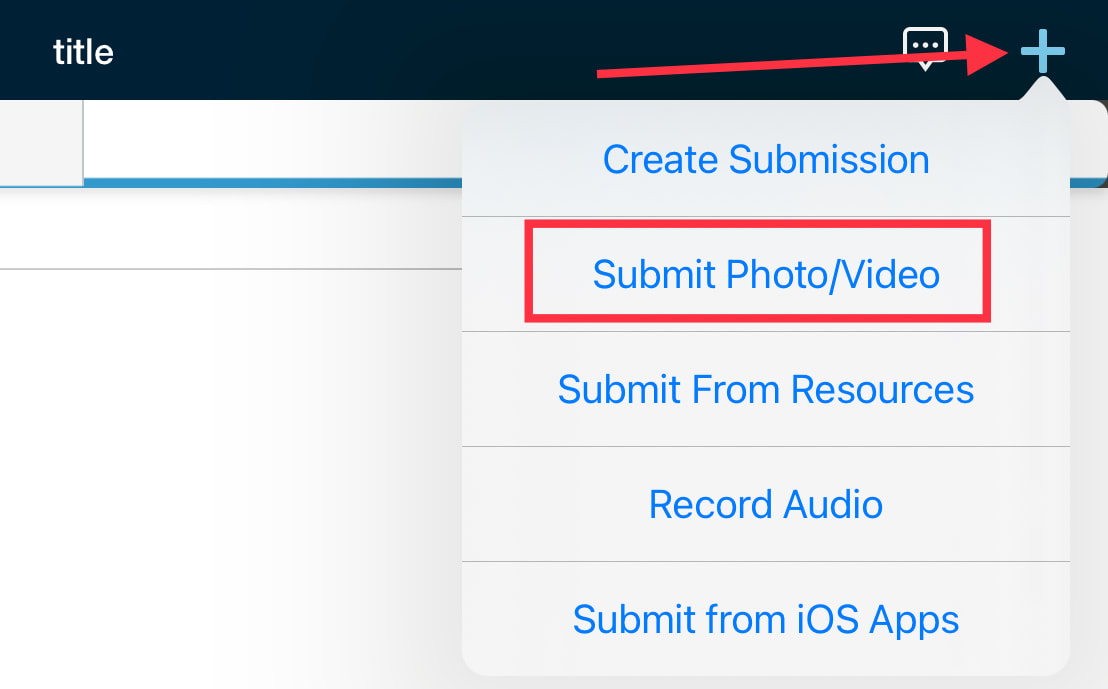
6. To submit to an assignment, open the assignment and choose "Submit Photo/Video".
6. To submit to an assignment, open the assignment and choose "Submit Photo/Video".
Submitting a Discussion Post
|
Submitting an Assignment
|
Official Explain Everything Tutorials
Basic tutorials, managing slides, using the different tools, advanced tutorials, using the timeline, merging/ deleting projects, and more!
